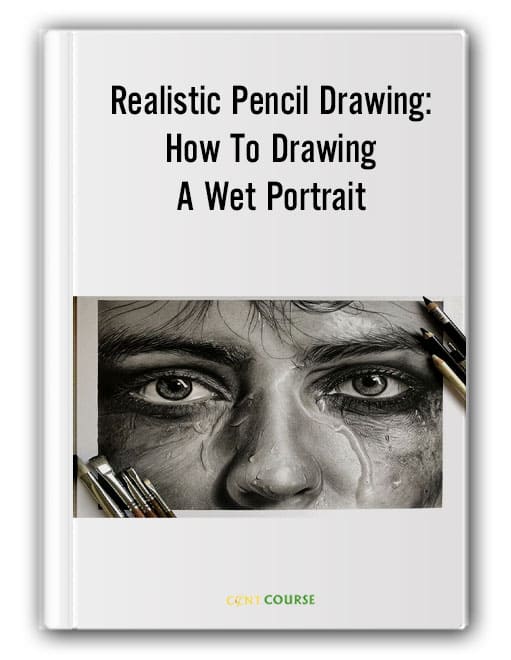
Realistic Pencil Drawing: How To Drawing A Wet Portrait
Realistic Pencil Drawing: How To Drawing A Wet Portrait teaches you how to draw realistic portrait with conte and charcoal pencil.
Categories: Art, Free Download
Realistic Pencil Drawing: How To Drawing A Wet Portrait Description
Realistic Pencil Drawing: How To Drawing A Wet Portrait reveals the secret to drawing a hyperreal portrait. It teaches you to draw skin textures, wetness on the face, creating water drops in great details with the chiaroscuro technique.
Here’s what you will learn in this course:
- Introduction
- Introduction
- Main Picture
- Sketching the right eye
- Drawing the right eye with pencil
- Completing the iris of the right eye
- Shading the eye with brush and charcoal
- A foundation for eye’s textures
- Creating a dark volume under the right eyelid
- Continue subcutaneous texture of the right eye
- Creating volume for the right side of the face
- Creating the volume of right side of the face
- Foundation of the eyebrow
- Subcutaneous of eyebrow
- Volume and textures for the right side of the face
- Completing the right eyebrow and creating the right volume of the forehead and u
- Creating a shiny texture on the eyelid
- Creating light inside the right eye and around the eye
- Creating shiny texture right side of forehead
- Drawing the inner corner texture of the right eye
- Drawing drop of water and completing the texture of the inner corner of the righ
- Start creating the linear texture under the right eye
- Creating fine lines under the right eye
- Creating volume and exposure to the eye texture in the lower right eye
- Learn to create fine linear textures under the eyes and drawing the right eyela
- Completing eyelashes and fine textures of the right eye
- Creating the water droplets and water texture
- Completing the texture created in the previous step by adding darkness
- Creating the subcutaneous of drops of running water on the right side of the fac
- Completing running water drops and water gender
- Completing the textures of the right side of the face and cheek
- Learn how to make a paper funnel and use it to create textures
- Continue creating the right cheek and lip texture
- Completing light and dark textures of cheek
- Creating the texture of the inner part of the right cheek with the eraser
- Continue to create the texture of the inner part of the right cheek with an el
- Lightening of right cheek texture
- Creating the volume and the texture of the nose
- Drawing the darkness of the tip of the nose with a charcoal pencil
- Shading and shaping the volume of the tip of the nose
- Shading subcutaneous of the nose blade volume
- Completing the darkness of the nose volume with charcoal and a brush
- Creating light to create nasal textures
- Creating intense light and subcutaneous of the drops on the nose
- Work with an fader to shape water droplets on the nose
- Completing the texture and drops on the nose
- Sketching the left eye
- Drawing the left iris with pencil
- Continue the left eye with a pencil
- Completing the iris of the left eye
- Completing the left eyelid
- Creating the left eyebrow, creating the volume of the eyelid and the forehead
- Create volume behind the eyelid and start drawing eyebrow hair
- Drawing the left eyebrow
- Drawing the left side of forehead
- Create a dark texture behind the left eyelid with a pencil
- Erasing the texture behind the eyelids and drawing the eyebrow hairs
- Completing the left eyebrow
- Creating wet hair on the forehead
- Completing the darkness of the forehead and draw the hair with a pencil
- Completing the wet hair on the forehead
- Creating the volume for the left side of the face
- Creating lower subcutaneous of left eye
- Volume the left side of the face
- Creating the skin texture on the forehead
- Creating skin lights on the forehead
- Completing the eyelashes and the foundation for water droplets on the left side
- Completing eyelashes and whiteness of the left eye
- The textures under the eyes and subcutaneous of the water droplets on the left
- Completing the textures of the nose
- Completing the texture and darkness of the blade of the nose
- Final completion of nose texture
- Creating the textures for the left cheek
- Creating texture next to the nose on the left side of the face
- Create left cheek texture with eraser
- Continue to create textures on the left side of the face with a brush eraser an
- Completing the darkness and lightness of textures on the left side of face
- Completing the lights using different erasers and the white pen
- Completing the lights using a variety of erasers and white pens
- Final explanations and finishing the work
- Final explanations and completion of work
Related products
Free Download
Free Download
Free Download
Free Download
Free Download


![Docker - Deep Dive [LINUX Academy] 2 Docker - Deep Dive [LINUX Academy]](https://centcourse.com/wp-content/uploads/2022/11/docker-deep-dive-100x100.jpg)


